Configuring Airlock Gateway for the Unblu Cloud
The Airlock Gateway is one of the security products expressly supported by Unblu for securing public internet access to Unblu installations. This article describes how to configure an Airlock Gateway to upload resources such as CSS files, images, and fonts securely to the Collaboration Server via the SecureFlow Manager (SFM).
| There are three guides for configuring the Airlock Gateway. Go through the checklist to choose the appropriate instructions for your use case before you start configuring the Airlock Gateway. |
In on-premises Unblu installations, both your website and Unblu are behind the Airlock Gateway. If you use the Unblu Cloud and the Airlock Gateway, however, the situation is slightly different. The Unblu site integration doesn’t pass the Airlock Gateway. Instead, it goes directly to the Unblu Cloud. As a result the changes Unblu requires to your Airlock configuration are different from those for on-premises installations.
Before you start
Before you start, check your setup meets the following requirements:
-
Open the Airlock administration interface and navigate to .
-
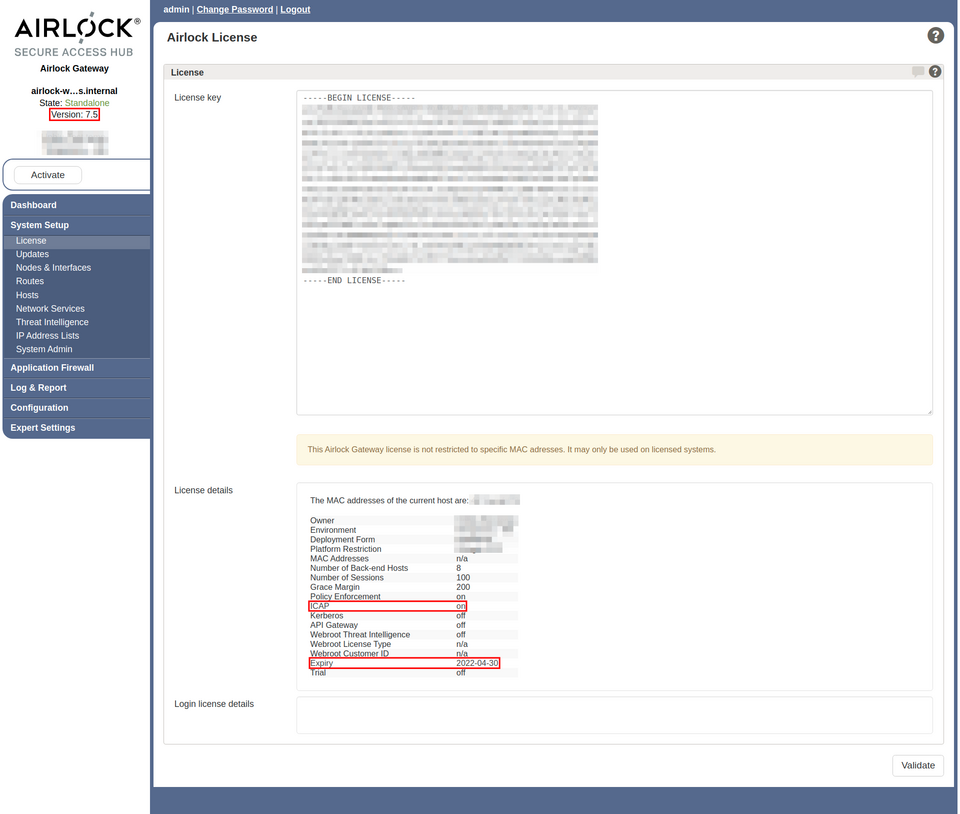
Make sure the version of Airlock Gateway you’re using is 5.3 or higher.
-
Check that:
-
ICAP is on.
-
Expiry is a date in the future.
-
 Figure 1. Airlock license screen
 -
-
Open the Unblu Account Configuration interface and navigate to the account settings. Make sure that com.unblu.cookiestrategy.enableClientCookie is set to
true.
Configure Airlock Gateway to use the Unblu resource history
The steps below ensure that your agents see the same thing as your visitors in embedded co-browsing sessions.
Configure the ICAP network service
-
In the left sidebar of the Airlock administration interface, navigate to .
-
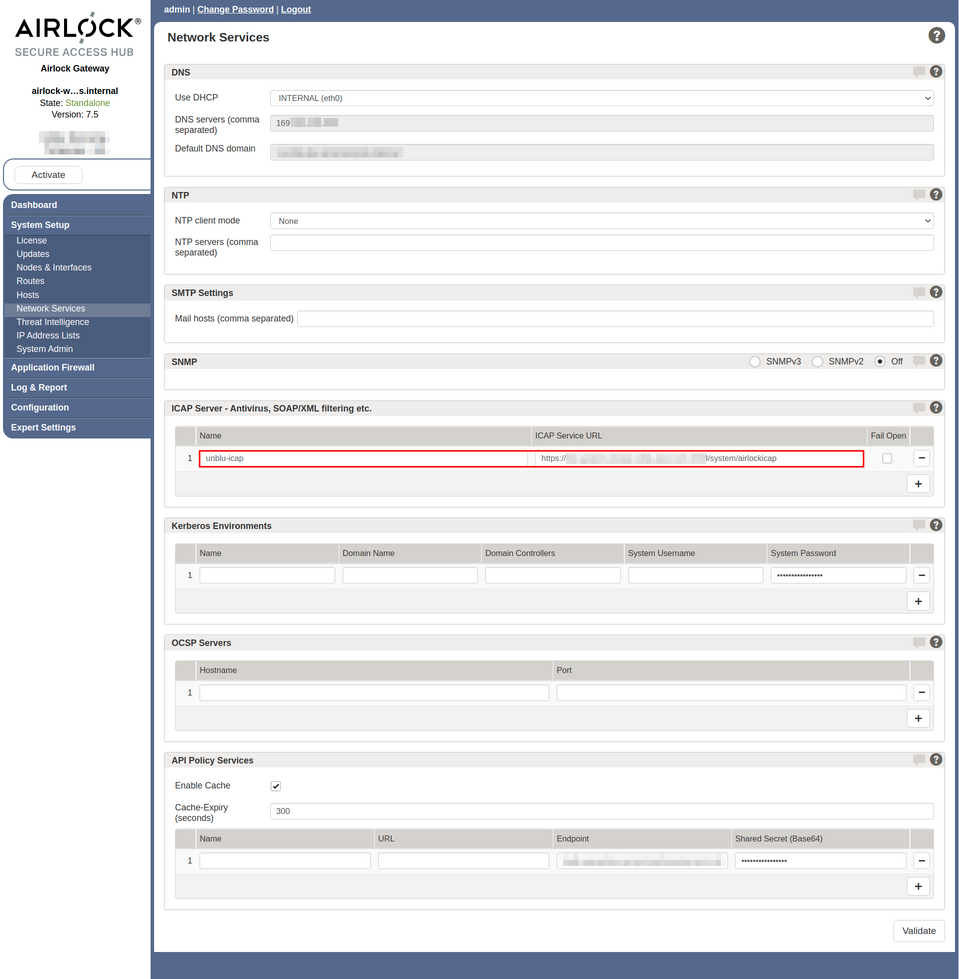
Add a new entry in the section ICAP Server - Antivirus, SOAP/XML filtering etc.
 Figure 2. Airlock network services screen
 -
Give the new entry a name of your choice and enter the ICAP Service URL:
Listing 1. Airlock ICAP service URL for an Unblu Cloud account# ICAP service URL format https://<unblu-cloud-fqdn:port>/system/airlockicap/version-2/<api-key> (1) (2) # Example https://unblu.yourcompany.com:12345/system/airlockicap/version-2/MZsy5sFESYqU7MawXZgR_w1 Replace <unblu-cloud-fqdn:port>with the fully qualified domain name and port of your Unblu Cloud account.2 Replace <api-key>with the Unblu API key you want to use.Choose a name for the ICAP service that makes it clear which Unblu account uses it. This makes it easier to select the right ICAP service when you configure the mapping for your application back-end.
Configure the mapping for the application back-end
To configure ICAP for the mapping of your Unblu-enabled application back-end:
-
In the left sidebar of the Airlock administration interface, navigate to .
-
In the main window, select the mapping from your virtual host to the application back-end and click on its pencil icon
to edit it.
-
Open the ICAP tab.
-
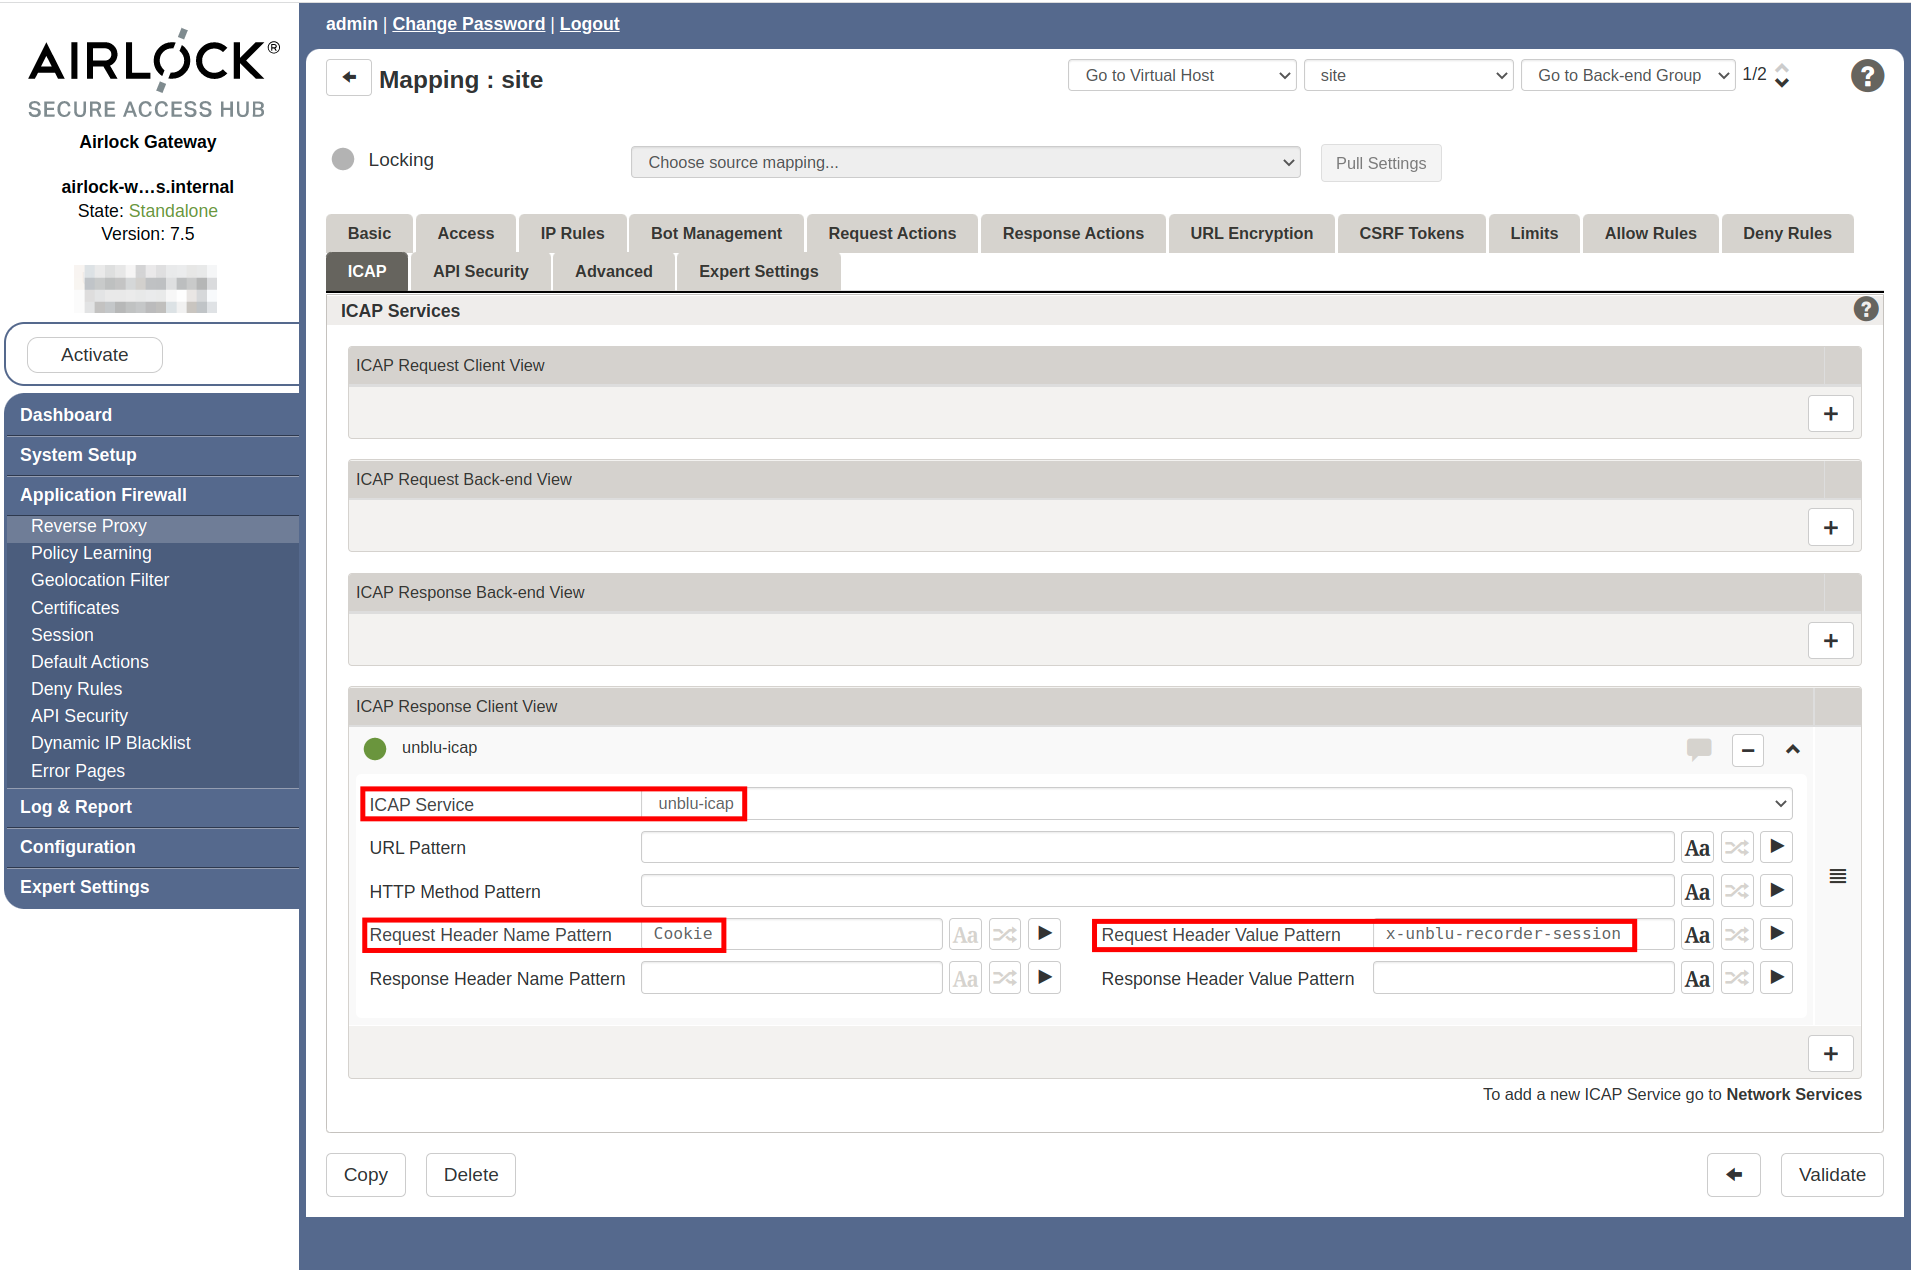
Create a new ICAP Response Client View:
-
Select the name of the ICAP Service you set up.
-
Enter
Cookieas the Request Header Name Pattern. -
Enter the value of com.unblu.domcap.cookieName followed by an equals sign
=as the Request Header Value Pattern. If you haven’t changed the default values for the cookie name and the cookie name prefix, the value to enter isx-unblu-recorder-session=.You may need to add the name of the cookie specified in the configuration property com.unblu.conversationsession.cookieName to the pattern, too. (The default name is
x-unblu-conversation-session) Before doing so, speak with a solution architect or solution integration engineer from Unblu to check whether this is required for your use case.
 Figure 3. Airlock application back-end mapping, ICAP tab
 -
Configure the Security Gate
The Security Gate settings must be configured in the global scope.
-
In the left sidebar of the Airlock administration interface, navigate to .
-
In the main window, set Security Gate to ON and enter the following information in the Security Gate text field:
"Icap.Service.Unblu.Icap.Action.0.Header.Insert.Name" "Authorization"
"Icap.Service.Unblu.Icap.Action.0.Header.Insert.Value" "Basic <sfm-token>" (1)
1 Replace <sfm-token>with the base64-encoded username and password provided by Unblu. -
If you need to configure the outgoing proxy for the ICAP interface, add the following lines to the Security Gate text field:
"Icap.Service.Unblu.Icap.Action.1.Header.Insert.Name" "X-Forwarded-Proto"
"Icap.Service.Unblu.Icap.Action.1.Header.Insert.Value" "%ENTRYPROTOCOL%"

"Icap.Service.Unblu.Icap.Proxy" "<proxy-address>" (1)
1 Replace <proxy-address>with the address of the outgoing proxy.
See also
-
For more information on the Airlock Gateway, refer to the Airlock Secure Access Hub and the hardware requirements.