Integrating Unblu in the Salesforce Financial Services Cloud
Unblu provides an out-of-the-box app on the Salesforce AppExchange. The app lets you augment Salesforce chat with co-browsing as well as Unblu audio and video calls. You can also use it to enrich your phone calls with co-browsing while staying on relevant Salesforce pages, such as Lead and Opportunity records.
The data pertaining to every co-browsing session or Unblu call is synchronized with Salesforce as Unblu Conversations and linked to the relevant objects, for example, Chat Transcript, Lead, or Opportunity.
This article describes how to integrate Unblu in the Salesforce Financial Service Cloud.
| The instructions below are intended for customer using the Unblu Cloud. If you run Unblu on-premises, contact your Unblu account manager for further information. |
Prerequisites
To follow the instructions in this article, you must meet the following prerequisites:
-
You’re a Salesforce administrator in your organization and have the Unblu
ADMINrole. -
Your organization is currently on the Salesforce Financial Services Cloud and has omni-channel enabled.
-
Agent single sign-on (SSO) is enabled in your Unblu installation. Salesforce will act as an identity provider (IDP) to perform agent SSO into Unblu via a Connected App.
You’ve obtained a URL from the Unblu Professional Services team. This URL is associated with your Unblu account and is required by Salesforce.
The Unblu Professional Services team will assist you with the installation. They provide you with all the necessary details to complete the configuration, such as the server URL and other information associated with your Unblu environment.
Integration steps
To integrate Unblu in the Salesforce Financial Service Cloud, you must complete the following steps:
-
Install the Unblu app from the Salesforce AppExchange.
-
Set up data synchronization between Unblu and Salesforce.
-
Set up agent single sign-on in Salesforce.
-
Configure the Unblu app in Salesforce.
-
Add Unblu components to Salesforce pages of your choice.
-
Create users in Unblu.
Each step is described in the sections below.
You must complete the steps for both your non-production and production environments.
Installation
You can install the Unblu app directly from the AppExchange. Install the app for Salesforce administrators only.
Set up the data synchronization connection
To enable Unblu to deliver the necessary data when a conversation ends, you must set up an endpoint in your Salesforce organization to listen for the Unblu webhook. You must then create the Unblu webhook that sends events to your endpoint.
Create an endpoint for Unblu in your Salesforce organization
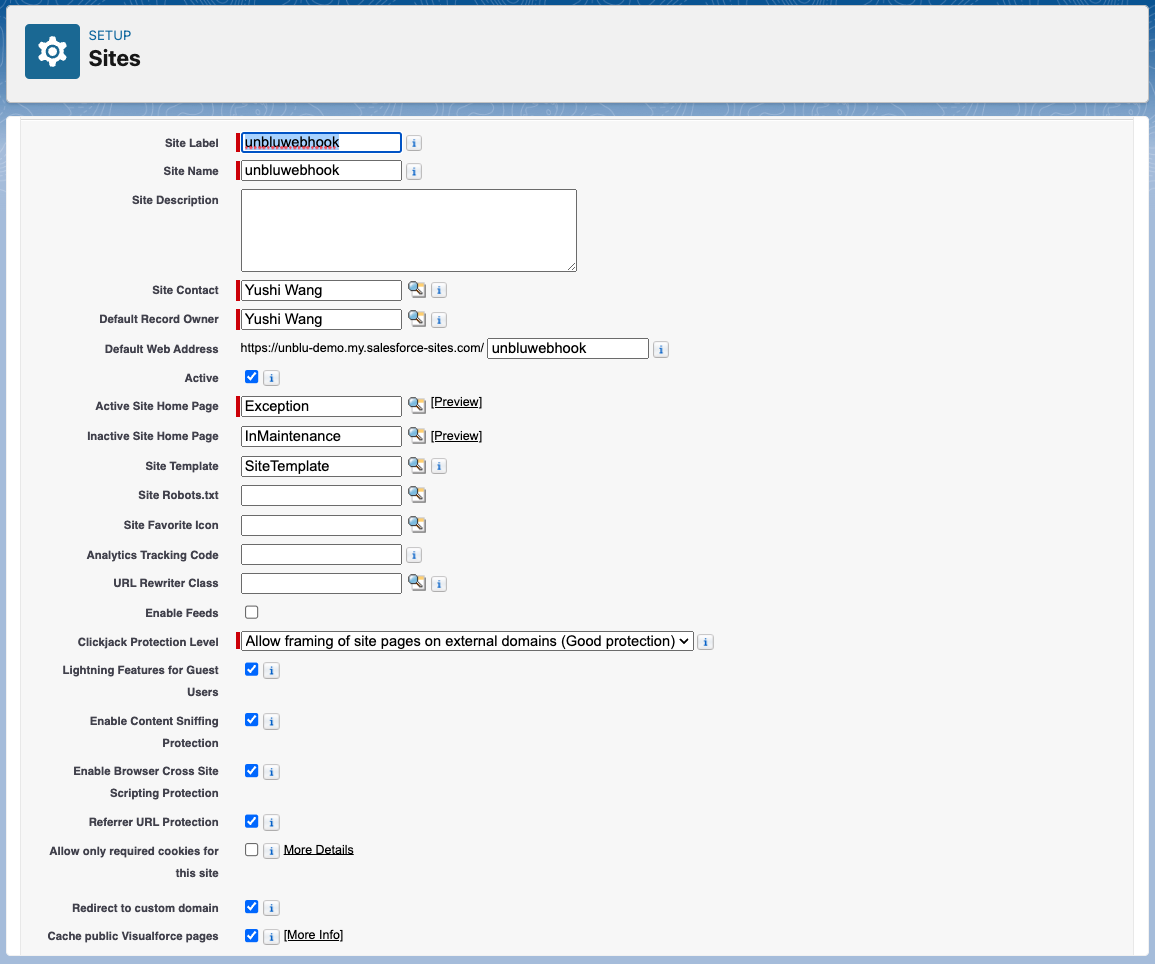
The endpoint for Unblu must be a site in Salesforce. Follow the steps below to create the site:
-
On the Setup page, open Sites.
-
Create a new site and give it a name, for example "unbluwebhook."
-
Configure the path, for example "unbluwebhook."
-
Select Active.
When you’ve completed these steps, the settings of the new site should look like this:
-
Click Save to save the site.
-
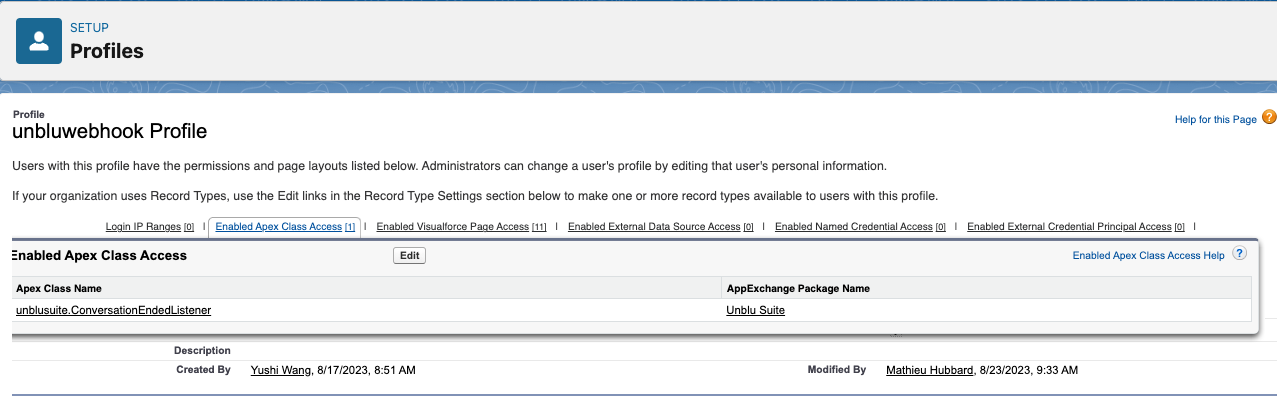
Once you’ve created the site, view it from the Setup page and open Public Access Settings.
-
Select Enabled Apex Class Access and add
unblusuite.ConversationEndedListenerto the list Enabled Apex Classes.
When you’ve done that, the Enabled Apex Class Access tab of your site should look like this:
Create a webhook in Unblu to send events to your Salesforce site
In the Unblu Account Configuration interface, create a webhook to send events to the site you created in the steps outlined above. The Unblu Professional Services team can assist you with this step.
-
Click Webhooks to open the webhooks overview, then click the New webhook button.
-
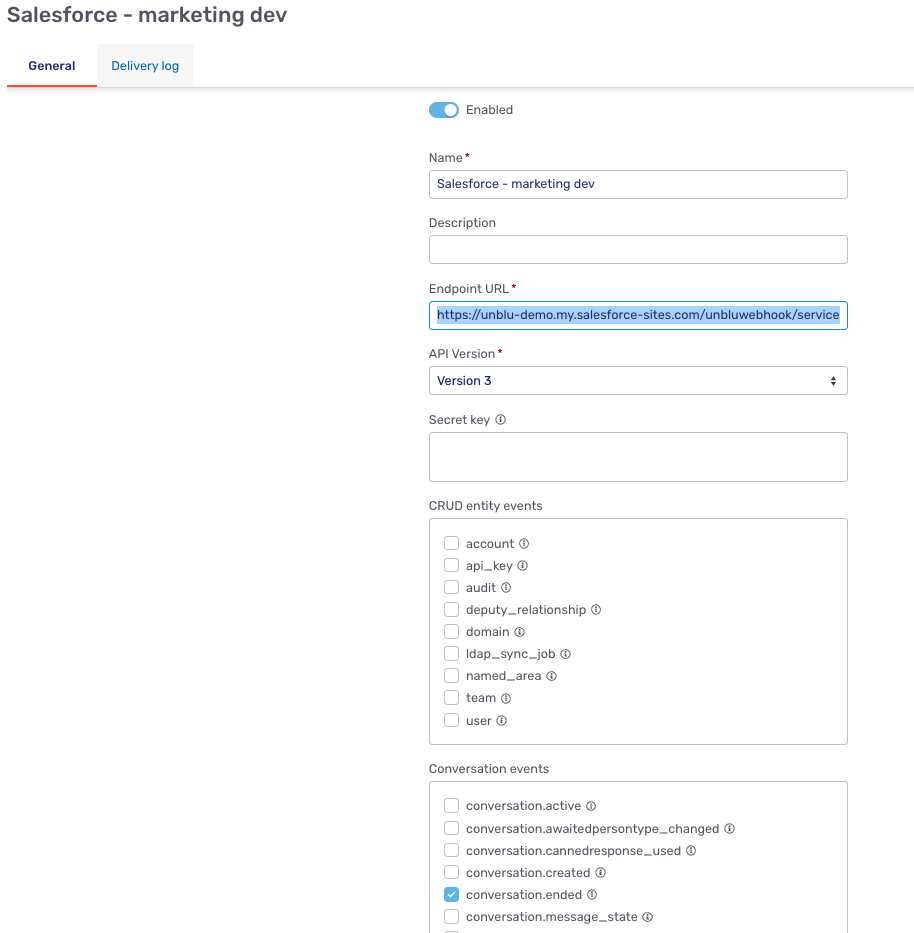
Enter a name for the webhook, for example "Salesforce integration."
-
Enter the endpoint using the site and path your created above and append
services/apexrest/unblusuite/ConversationEnded. For example, if your server URL ishttps://your-company.my.salesforce-sites.com/unbluwebhook/, the endpoint for the webhook ishttps://your-company.my.salesforce-sites.com/unbluwebhook/services/apexrest/unblusuite/ConversationEnded. -
In the Conversation events section, select conversation.ended.
-
Optionally, you can include a secret that allows you to verify that a webhook was sent by Unblu. This is highly recommended for production environments.
-
Ensure the toggle at the top of the Create webhook fly-in page is set to Enabled.
When you’ve entered all the details of the webhook, the fly-in page should look something like this:
Click Save at the bottom of the fly-in page to save your new webhook.
Set up agent single sign-on (SSO)
To set up agent SSO, you must create and configure a Connected App in your Salesforce organization.
-
In the Setup page, open App Manager and select New Connected App.
-
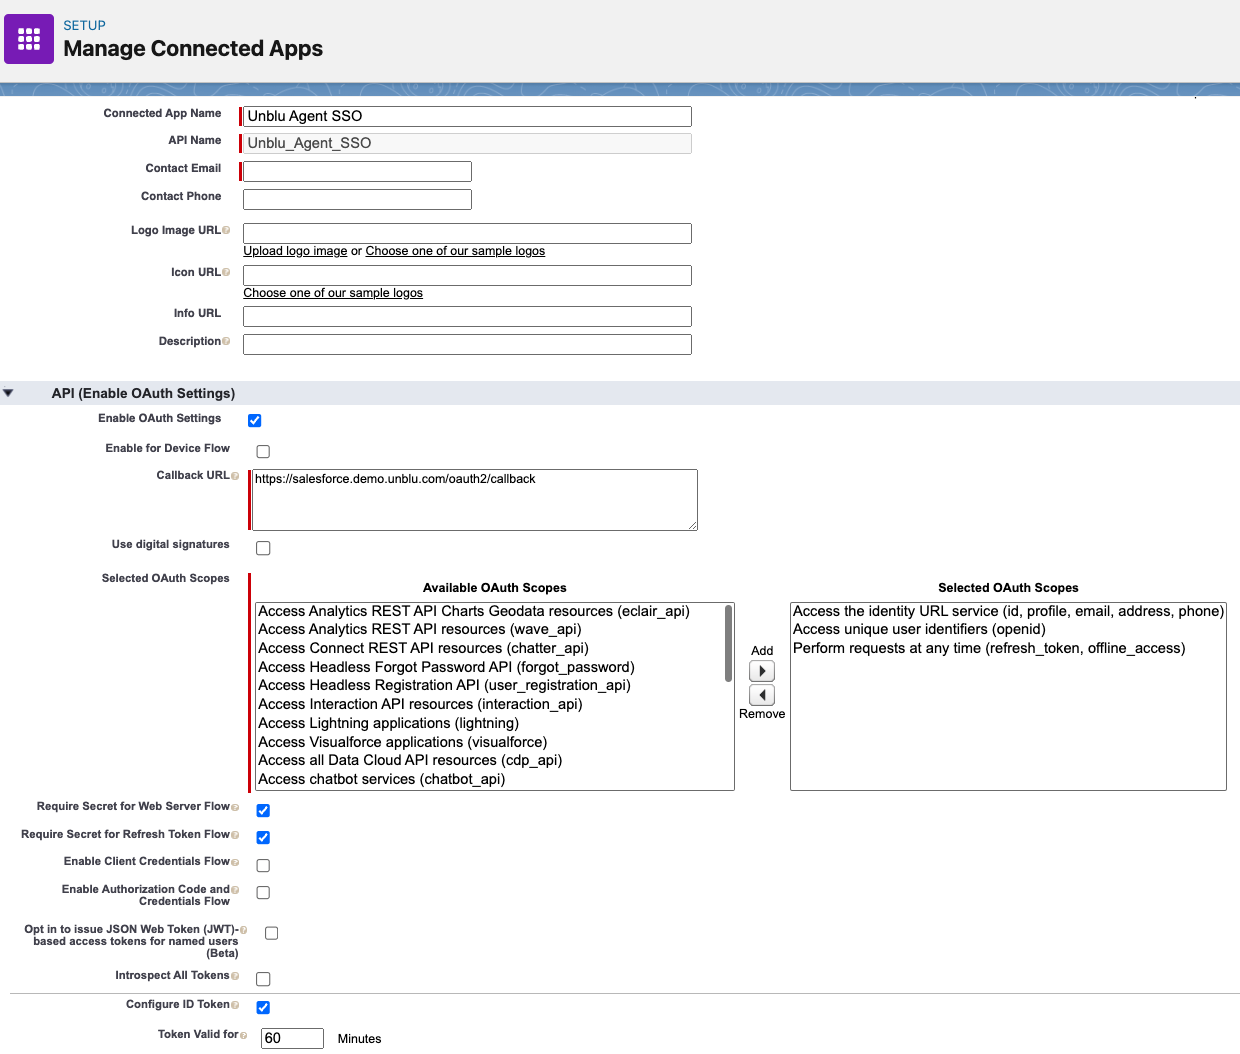
Enter a name for the Connected App, for example "Unblu Agent SSO."
-
Select Enable OAuth Settings.
-
In the field Callback URL, enter the URL provided by the Unblu Professional Services team.
-
Select the following OAuth scopes:
-
Access the identity URL service (id, profile, email, address, phone)
-
Access unique user identifiers (openid)
-
Perform requests at any time (refresh_token, offline_access)
-
-
Enable Require Secret for Web Server Flow
-
Enable Require Secret for Refresh Token Flow
-
Enable Configure ID Token and add the following settings:
-
Set Token valid for to 60 minutes.
-
Enable Include Standard Claims
-
When you’ve completed all these steps, the Connected App looks like this:
You must provide the Unblu Professional Services Team with the consumer key and secret so they can complete the configuration in the Unblu Cloud.
To give relevant Salesforce users access to the Unblu components once you’ve set them up, assign them the Unblu Agent permission set in Salesforce. This gives them access to the Unblu components and lets them use the features you enable.
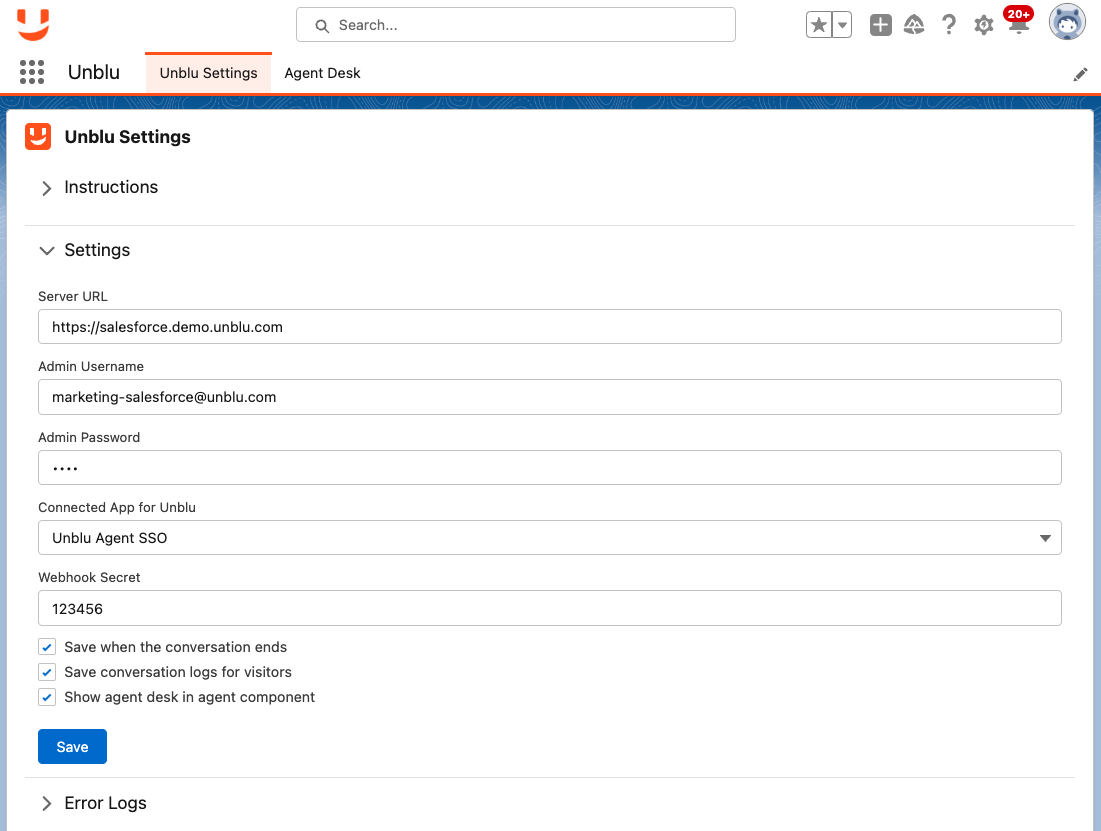
Configure the Unblu app in Salesforce
Once you’ve installed the Unblu app, Salesforce administrators can access it from the App Launcher button in your Salesforce organization. Open the Unblu app’s Unblu Settings tab and define the following settings:
-
Enter the Server URL as provided by the Unblu Professional Services team.
-
Enter the Unblu administrator username and password. This is an integration user that the app uses to make API calls from Salesforce to Unblu, for example, to synchronize conversation data.
-
Select the Connected App created in the previous section.
-
If you configured the Unblu webhook with a secret, enter the webhook secret. The value must match the secret of the webhook you created for Salesforce in Unblu.
-
Enable the following options as needed:
-
Save when the conversation ends
-
Save conversation logs for visitors
-
Show Agent Desk in agent component
-
When you’ve finished, the Unblu Settings tab looks something like this:
Connect Unblu and Salesforce
To establish the connection between Unblu and Salesforce, complete the steps below:
-
Go to your Salesforce organization’s Setup page and open the Remote Site Settings.
-
Click Add New Remote Site and enter the Server URL you entered on the Unblu settings page (provided to you by the Unblu team)
-
Check the Active box.
-
Click Save.
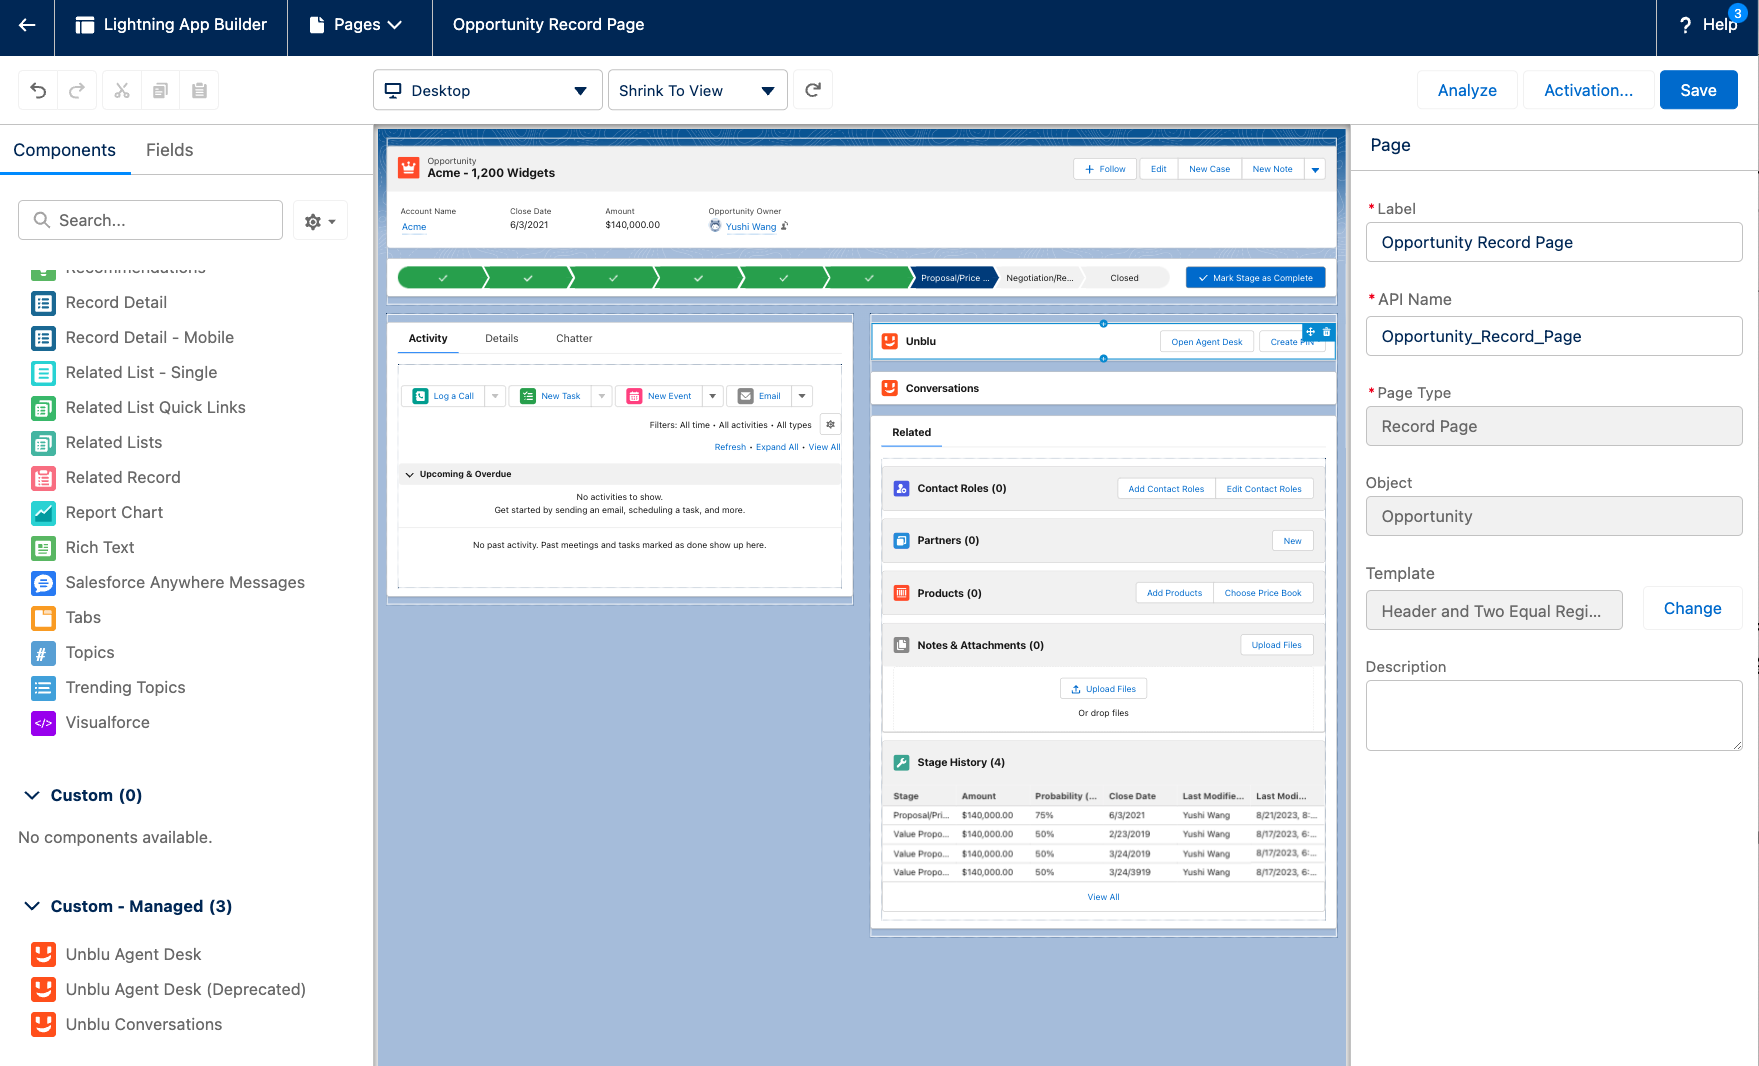
Add Unblu components to relevant pages in Salesforce
The Unblu app comes with two components:
-
Unblu Agent Desk is used to create a PIN and open the Unblu Agent Desk (if you enabled the latter in the Unblu app’s settings). It’s also the component that co-browsing sessions are rendered in. Make sure it’s located in a region that occupies at least one third of the width of the screen.
-
Unblu Conversations is used to display the synchronized session data associated with an object.
To add Unblu components to relevant pages such as Chat Transcript, Lead, or Opportunity, go to the Lightning App Builder and add the Unblu Agent Desk or Unblu Conversations to the page in question.
A page with the Unblu components looks like this:
Unblu user setup
In addition to granting users the right permission set in Salesforce, you must create corresponding users in Unblu.
-
In the Unblu Account Configuration interface, click Users, then click New user.
-
Create each new user with the following details:
-
Email address: Enter the same value as in the user’s email address field in Salesforce, not the Salesforce user ID.
-
Authorization role: Select the appropriate role for the user in question:
-
Registered user for agents
-
Supervisor for supervisors
-
Admin for Unblu administrators
-
-
Password: Select Create user without password.
-
-
Click Save to complete the process.
For more information on creating users in Unblu, refer to User management in the Account Configuration interface guide.
Alternatively, use Unblu’s web API /users/create endpoint to create users.
See also
-
You can install the Unblu App from the Salesforce AppExchange Unblu app page.
-
For more information on setting up webhooks in the Unblu UI, refer to the Webhooks section of the Account Configuraton interface guide.
-
For more information on creating users in Unblu, refer to User management in the Account Configuration interface guide and the description of the
/users/createendpoint.