|
This document describes version 5 of Unblu. If you’re using the latest major version of Unblu, go to the documentation of the latest version. The support period for version 5 ended on 22 November 2021. We no longer provide support or updates for this version. You should upgrade to the latest version of Unblu. |
Avatars
Starting with version 5 you can personalize your people, teams, and even conversations themselves, with avatars. This means you can upload any image that you believe best communicates your values, and your visitors, and colleagues registered in the system, will be able to see the teams/users, etc., represented by that image.
| Avatars also denote 'availability'. See Availability Bubble for more. |
| If you want to load avatars you can go straight to Load the Avatar Image. |
Avatars can be defined according to any of the following scopes:
-
Account
-
Named Area
-
Team (and sub-teams)
-
User
| The tone of the relationships you intend to foster can dictate whether you use, for example, a photograph of an agent or team, to build trust, or perhaps you may want to use something a little different? |

| The little green 'bubble' at the right corner of the image above signifies availability. See Availability Bubble for more. |
If you do not wish to personalize your avatar then the default value will take the first letter of the identifier (e.g., of a name) and place it within a coloured circle.
File types and Limitations
Permitted file types: PNG or JPEG
Recommended dimensions: 256px x 256px
Maximum file size: 5MB
Where do the Avatars Display?
Visitors will see the avatars display in the Conversation User Interface alongside the names, and comments, of recipients, such as agents, teams, named areas and accounts.
Agents and other internal users will see avatars accompanying visitor, and other, IDs in the Conversation UI. Internal users will also see the avatar of the logged-in user in the top-right corner of the Agent Desk, and in the Inbox, the Account overview, and in lists of users, Teams, Named Areas and Accounts, and when forwarding Conversations.
Avatar Images and Fallback Behavior
-
With no avatar images loaded, each entity will display a default avatar. See Default Avatar Example for more.
-
With no avatar fallback configured, each entity will display its image, if an image has been uploaded. If no image is available the default avatar will display.
-
With the Person avatar fallback configuration (com.unblu.messenger.usePersonAvatarFallback) set to true, if no image is available, the software will apply the next available (upstream) avatar. See the Properties table below and Person Avatar Fallback for more.
-
With the Recipient avatar fallback configuration (com.unblu.messenger.useRecipientAvatarFallback) set to true, if no image is available, the software will apply the next available (upstream) avatar and display that avatar to the recipient of a conversation. See the Properties table below and Recipient Avatar Fallback for more on the recipients of a conversation.
| The Person avatar fallback value is applied to the 'Agent Person' while a Recipient avatar fallback value is applied to the recipient of the Conversation. |
All Conversations have a single Recipient but can have multiple participants
-
Multiple participants — of those participants, in any Conversation there must be two required participants:
-
A Visitor (Context Person )
-
An Assigned Agent (Assignee) (The main Agent responsible for the Conversation.)
-
| Visitors never have a fallback. Visitors can be represented only by an uploaded image or the default avatar. |
A simple example of how this might work for visitors: The first time a visitor clicks to open a Conversation they may, for example, see an avatar that represents an Account or Named Area. They enter their text and send. Then, on the Agent side, the message goes into the Queue. But as soon as the request is answered, by an Agent, that Agent’s avatar will display to the visitor. This is because as long as there is no Assignee-Agent in a Conversation you will see the avatar of the recipient. If an Agent then joins the Conversation you will see the avatar of the Agent (and not the recipient). As soon as there is more than a single participant in a Conversation the Visitor no longer sees the recipient Avatar but the avatar of the Agent the Visitor is communicating with.
| Multiple avatars can display when there are multiple participants in the Conversation. Each Avatar will also display the availability status of each of those participants. |
Avatar Fallback Configuration Properties
There are two properties that define what people see (according to their role in any conversation), and one that defines the background colors of default avatars.
| Property | Description |
|---|---|
If TRUE then, if no avatar is set for an 'Agent Person', the product will cycle through the next levels according to Fallback Runtime Precedence and inherit the first avatar it finds from the level(s) above. (For example, if 'User', and no User avatar exists, then check Team. If Team has an avatar then use it. If not: Check Account. If no avatars can be found, use default avatar.) |
|
Works in exactly the same way as the person fallback but is essentially a fallback for the recipient of the Conversation. See Recipient Avatar Fallback for more. |
|
Sets the colors that will be applied (quasi-) randomly to default avatars if no avatar is uploaded. |
Inheritance
Like all Unblu configuration values, that are delineated by scope, the avatar images uploaded higher up in the tree are inherited by those below. (See Precedence Matters for more on inheritance.)
| Images can only 'cascade' down through roles if the fallback value is activated. |
Fallback Runtime Precedence
The lowest node in the hierarchy is the one that is consumed by the Unblu server. This means that an avatar image applied above any given (role) level will propagate downwards (if the fallback is activated and there is no avatar set at the current level). If, for example, you loaded an avatar image at the Account level (and set com.unblu.messenger.usePersonAvatarFallback=TRUE) then all agents could inherit that avatar (if they have not assigned one). However, agents or teams, or even named areas, can have their own personalized avatars, as the lowest node in the tree is the one that will be 'picked up' and displayed. This makes it easy to control and manage, as many avatar images can be applied across all internal users almost as easily as a single image can be uploaded.
If you load an avatar at the Account level, and set com.unblu.messenger.useRecipientAvatarFallback=TRUE then the Conversation (in the Visitor UI - the chat box) a visitor is looking at would display the Account avatar unless the page was part of a Named Area; in which case the avatar for the Named Area (if one has been uploaded) would display. If no avatar is set for the named area it will inherit the avatar loaded for the Account.
| Setting com.unblu.messenger.useRecipientAvatarFallback=FALSE means you can still upload your own avatars but you will not inherit any avatar images from the levels above. There can be no 'cascade'. With no explicit avatar image loaded you will be allocated a default avatar. |
Setting Avatar Fallback Properties
With no avatar image loaded the default for the name, 'John Doe' (in the example below) takes the initial letter of the first name and applies a (quasi-) random colour. When two names/descriptors start with the same letter, a different colour will, in most cases, be automatically applied.
Person Avatar Fallback
While only a single avatar can be loaded for any given role or entity, what is displayed depends on the activity at hand. A new, unregistered visitor, for example, cannot have a fallback avatar.
Another example could be when a complex Conversation is forwarded. You may want the recipients of that forwarded Conversation to see, perhaps, the Team avatar(s) rather than individual agent avatars or default values.
Recipient Avatar Fallback
If enabled, and in the absence of an avatar, the Recipient avatar will display the inherited avatar(s) to the recipient of any conversation.
In essence, while the Person avatar is applied to entities (Person, team, etc.) the Recipient avatar applies to the conversation itself. That is, if switched on (true), it controls what a recipient, or recipients, of a conversation actually see.
| If an agent forwards a Conversation to another agent or team this will change the Recipient of that Conversation. |
Setting Default Avatar Colors
The Secondary map (com.unblu.theme.color.secondaryColorMap) sets a color palette which is used to create default avatars (which are used in the absence of an uploaded or inherited avatar).
| Setting the color palette is probably something best defined at the highest level in your account, as it may involve compliance with company standards and branding, while uploading avatars may be something performed at the Agent and Team levels. |
In the Agent Desk, from the main menu, in Settings, select Settings then search for secondaryColorMap.
You can add as many colors as you wish by clicking the cross icon ![]() then defining the color. These colors are then applied (quasi-) randomly to create default avatars.
then defining the color. These colors are then applied (quasi-) randomly to create default avatars.
Availability Bubble
The little colored 'bubble' at the bottom-right of the loaded avatar denotes availability. The picture below is what an agent might see upon answering a request from an unknown visitor.
| If you wish to configure the fine tuning of 'availability' itself, see Agent Availability, Timeout Criteria, Last Visitor in Session, and Isolated Mode. |
The header area in the visitor UI (Conversation box) can accommodate multiple icons with information regarding availability. Below is a representation of what a visitor might see after selecting a conversation the visitor (previously) had with two representatives (within the same Conversation).
Availability Bubble Color Keys
-
Green = Available
-
Yellow = Unavailable
-
An Avatar showing no bubble means that the recipient of the conversation is not currently signed-in to the system.
| Visitors listed in the Inbox can have only two states: Available (green) or Unavailable (no bubble). |
We see that there were two 'presences' in the conversation. The first is the handsome, and available, agent, and the red avatar represents something else. It could be a person or a team or an account or a named area.
If we hover the cursor over one of the avatars we can see who (or what role or entity) is represented by the avatar:
We can also see that the Super Admin is signed into the system but unavailable (yellow) while the handsome agent in the other avatar is available (green).
Load the Avatar Image
You can load avatar images at the Account, Named Area, Team and User levels.
Load the Avatar Image at the Account level
-
From the main menu select Account > General > Edit Account. The Edit Account modal window slides in from the right.
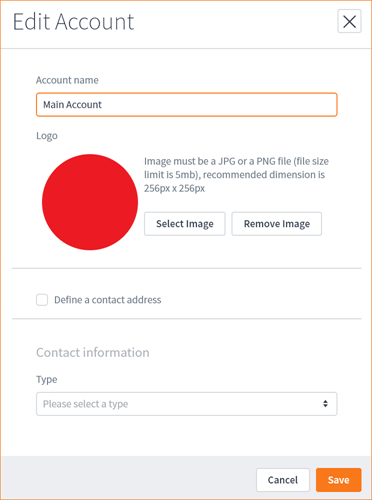
-
Choose the Select Image button (to load your image), then select the Save button.
Load the Avatar Image at the Named Area Level
From the main menu select Named Areas > (then the specific Named Area) > General, then choose the Select Image button and Save to load your image.